
How to Add Pressed Leaves to Your Journal Pages
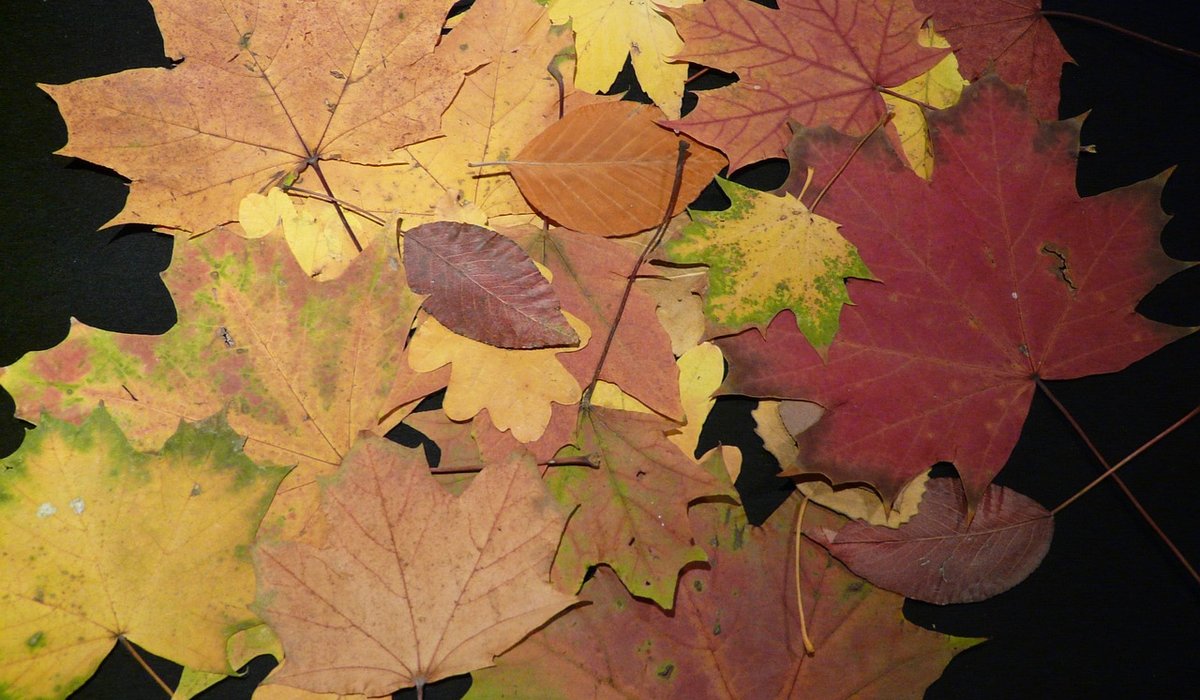
Gathering Leaves Worth Keeping
The best journal leaves are the ones you collect on a dry afternoon, not the ones you peel off wet pavement after a downpour. Damp leaves cling, curl and often carry mould, which will stain your pages and spread to anything stored beside them. Take a small basket or a rigid box rather than a plastic bag; leaves crushed together in a bag lose the crisp edges that make them worth pressing.
Look for leaves that are already flat, fully coloured and free of holes and browning. Thin, papery leaves press best: oak, beech, birch, hornbeam, field maple and most ornamental garden varieties are reliable. Thick, fleshy leaves and anything with a waxy coating tend to stay soft, go brown or simply refuse to dry. Small leaves — rowan, ash, vine — are wonderful for borders because you can lay dozens without overwhelming the page.
A note on good manners: take only fallen leaves, never pick from the tree, and leave nature reserves and private gardens alone. If you are collecting somewhere protected, check the local rules first, as some sites restrict removing plant material entirely.
Label as you go. Slip a scrap of paper into your basket with the date and place. Six weeks later you will not remember which park that russet maple came from, and a journal entry with a date and location is far more satisfying than an anonymous leaf.
Pressing and Drying Your Leaves
The traditional method still works beautifully. Sandwich each leaf between two sheets of blotting paper or kitchen paper, then place that between two sheets of newspaper, and slide the whole parcel into a heavy book. Stack more books on top. Leave for two to three weeks in a dry room, and change the blotting paper after the first few days if it feels damp.
If you are impatient, there are quicker routes:
- Ironing: place the leaf between two sheets of paper and press with a dry iron on the lowest setting, moving constantly. Thirty seconds is usually enough.
- Microwave: sandwich the leaf between paper towels, then between two ceramic tiles, and heat in thirty-second bursts, checking and cooling between each one. Stop the moment the leaf feels dry and papery.
- Flower press: a proper press with card and blotting paper gives the flattest results and is worth the shelf space if you plan to do this every autumn.
Never stack fresh leaves directly on top of one another, and keep them out of steamy kitchens and bathrooms while they dry. Humidity is the enemy of a crisp leaf.
Sealing Leaves Before They Touch the Page
A dried leaf is brittle and slightly acidic. Left raw, it will crumble at the edges, stain the paper around it and eventually snap in half every time you open the journal. Sealing solves all three problems.
Brush both sides with a clear-drying craft medium, or use diluted PVA glue — roughly one part glue to one part water. Work from the centre outwards with a soft flat brush, then leave the leaf to dry on greaseproof paper. The colour will deepen slightly, so test on a spare leaf before committing a favourite. Once sealed, the leaf bends instead of shattering, and the barrier layer keeps its oils and acids away from your page.
Attaching Leaves With Washi Tape and Glue
Washi tape is the forgiving option. It is low-tack, so you can lift and reposition a leaf without tearing the paper, and it comes in muted autumn shades that suit the season. Tear two short strips by hand for a soft, deckled edge, then lay one across the stem and one across the tip, angling them slightly so the leaf looks held rather than strapped down. Overlapping a few strips in different widths creates an attractive, deliberate framing effect.
For a neater finish, use glue. A fine-tip applicator or a glue pen lets you run a thin line around the leaf's outline rather than dumping a puddle in the middle. Acid-free glue sticks and diluted PVA both work well. Press the leaf down, then weight the page under a clean, heavy book for an hour. Avoid hot glue guns: they leave lumps, and the heat makes brittle leaves curl.
Other options worth trying include photo corners, a few neat stitches with a needle and thread through the stem, or a small paper pocket that lets you slide a whole collection onto the page without adhering it at all.
Designing Borders and Full Spreads
The simplest and most effective layout is a gradient border. Choose eight or ten small leaves and arrange them down the outer edge of the page, moving from green at the top through gold and amber to deep russet at the bottom. The eye reads it as a single sweep of colour rather than a row of specimens.
For a less formal look, cluster three leaves in the top corner of each spread, varying size and angle, and let the arrangement wander slightly. You might also try writing around a leaf rather than beside it, so your handwriting curves along its silhouette, or leaving the leaf as a stencil and sponging ink around the edge for a soft, ghostly shape.
Always take a photograph of your arrangement before you glue anything down. It is surprisingly easy to forget a layout you loved, and a phone snap lets you recreate it if the glue shifts.
Finally, annotate. A small, neat line in the margin — species, date, place, weather, who you were with — turns a decorative page into a genuine record of an afternoon.
Keeping Your Pages Looking Good for Years
Store finished journals flat or upright, away from damp and direct sunlight. Sunlight fades leaf pigments quickly, and reds disappear first, so a shelf that catches the afternoon sun is the worst possible home. If your house is damp, tuck a small silica gel sachet into the storage box and swap it every few months.
For the first month, slip a sheet of greaseproof paper between each leaf and the facing page. Sealed leaves can still emboss the paper opposite, and this simple barrier prevents it. Check your journals after a few weeks, reseal any edges that have lifted, and you will have pages that hold their colour through many autumns to come.


Collect twigs, bark, berries, and fallen leaves responsibly, then use your finds for sketching, printing, and simple craft projects.
Study the structure of seed heads and berries with close observation, then draw them using pencil, ink, or fine watercolour washes.
Introduce wool throws, velvet cushions, and woven baskets to make your living space feel inviting as the evenings grow cooler.
Bring autumn colours into your home through cushions, ceramics, and artwork, balancing warm shades with neutral walls and natural light.